Wednesday 3 September 2014
The Annual Back Country Ski Trip ...
Haven't posted here for a while, thought I'd better update something ... try this
http://forums.ski.com.au/xf/threads/quest-for-the-blazing-skies.67840/
Skibug
Saturday 17 May 2014
Kathamandu tent poles
For some years now I've been working as a leader for a school taking teenage groups of students on bushwalks of 2 to 4 days in length, and part of the job has been purchasing and maintaining equipment which they borrow (tents, stoves and maps). For quite a while, I stuck with Kathmandu brand tents - most recently the "Taku" 3 person hiking tent - it was a reasonable weight (around 4.3kg, from memory), relatively easy to put up and use, reasonably well performed in rain, and at a good price (when on sale - which is about 45 weeks a year), around $240.
http://www.productreview.com.au/p/kathmandu-taku.html
The low price was important, as often enough the students would lose pieces - so I was reluctant to see a $600 tent (though potentially having a longer life-span) become useless just because one part - say the inner - was left on a train. Over the years, as parts did disappear, by scavenging "leftovers" I could cobble together another tent.
 Unfortunately, it has got to the point where I can no longer justify their purchase, and it is because of one problem - pole breakages. The last year of so, I have at least one breakage per hike - and that's usually between 3 to 5 tents, and although I have been repairing them from older "retired" tents, I'm quickly running out of spares.
Interestingly, it's almost always the front-most pole, and always directly over the front entrance ie. at that pole's highest point), and I can only assume that it's slightly more flexed than the other two poles, as they are all the same construction except for the length and degree of flexion.
During the last repair session, I had a closer look at the breakages, which gave me a better understanding of what's going on.
 First, here's a picture of a typical breakage. It's usually the male end of the pole, where a narrower gauge piece is fitted and slides inside the next section. What was most interesting was to examine closely some other pieces which had not yet failed.
When I started buying Khatmandu tents over ten years ago, they used a longer, slightly bigger gauge pole (which I suspect were Easton, or a clone), and I rarely had breakages (it was, in fact, door zippers which were my bigger problem, though that was largely due to my students loving to cram 10 or more into a 3 person tent for the "slumber party" experience.)

Kathamndu have stopped selling this model, so I have decided to try the Marmot Limelight, which comes as both a 2 and 3 person model, uses DAC poles, and is somewhat lighter, though dearer (here in Australia) at around $300 - $350.
Wish me luck!
Skibug

Monday 21 April 2014
Saving weight by saving money - looking after your gear.
"I'm a tightwad!"
There, I said it. Actually, I'm not a miser, a hoarder, nor a poor friend - it's just that I'm a great believer in "a penny saved is a penny earned", and I always reckon - why waste money repeating purchases when I'd rather get new, quality items - new backpacking equipment, better household appliances, more interesting holidays, and so on. Money I save by making gear last longer, or by repairing rather than updating, is money I can put towards an expensive tent, sleeping bag, camera - or air-fare to a great expedition site.
If a sleeping bag costs $400, and you get 100 nights use out of it, it's cost is $4/night. If I can get 200 nights out of it, I'm down to $2/night, and over the longer period, I've saved the equivalent of $200, to spend on other items. So here are a few thoughts on looking after gear to make it last longer, and to decrease your usage cost - the amount it costs you per day/night of use you get out of an item.
Sleeping bags. Take great care of them in the field - especially be careful of snags and tears of the material, allowing down to escape. Be gentle with zippers - repairs cost big! Keep clean - always use an inner sheet - I figure every time a (down) sleeping bag is washed, you lose 1 to 2 degrees of warmth, so the less often I wash bags the longer the useful life. Don't dry clean down! I actually air dry the bag (in open shade) for 12 hours or so after every trip, with the zipper open wide to let air in and smells/moisture out.
Always store your bag dry, and always in a storage bag - a big cotton or breathable nylon bag that allows the down to be uncompressed - some people use a big pillow slip, but a bigger bag is even better.

Air mats. For a number of years now, I have used air mats, having evolved from the thinner "self inflating" mats on which I rarely slept "well". In contrast, some nights on the thicker mats (currently a Big Agnes insulated air core) I sleep as well as in my own bed at home - they really are great for comfort, and fine for warmth for all but snow camping.
The problem with air mats is that, unlike "self inflaters", which use the expansion of the insulating foam within the mat to draw air in, air mats need to be manually inflated - usually by mouth - like blowing up a balloon. This is fine with me - the increased comfort is more than worth the 2 minutes effort - but it does introduce a small amount of moisture to the interior of the mat, which probably does not come back out with deflation. This, in turn, could lead to deterioration of the materials within the mat - especially a breakdown of the air-tight lining - which could lead to leaks, and eventual failure. I've already thrown away three previous air mats, probably after, say 50 nights use over two or so years - and, being a tightwad I don't like it. (They were a different brand, and I suspect their design and materials were the real cause). Here's my solution:
When you inflate the mat, because you're introducing water vapour from your lungs at around body temperature (over 35 degrees C), most of it probably condenses immediately on the inside walls of the mat, which are at ambient temperature (say, 30 degrees C, or lower). It's effectively a "dew point" effect. To get that moisture back out, I have to re-evaporate it again back to vapour - by heating the mat (and the air inside) back to a temperature well above the "dew point".
So after the hike, when I get home, I re-inflate the mat, warm it up (either in the sun in the warmer seasons, or in front of a heater in the cooler seasons), and then squeeze out the air (by rolling it up) to expel what has now become water vapour (ie. it's now a gas, not liquid). I normally go through the process twice, to be absolutely sure I'm maximising the effect.
But how, you may ask, do I re-inflate the mat - if I blow into it, I'm just making the moisture problem worse. I experimented with several different methods, but settled on "the balloon method" - that is, a cheap party-balloon pump, connected to the valve by a cut-off balloon.
 |
| Balloon pump with cut-off balloon |
The trick I discovered (with my set-up) was to use the really small "water" balloons that kids use for water fights - they're only a few centimeters long un-inflated. I just found the regular size balloons were too big to get an air-tight, snug fit on the mat's valve. Cut off the very end of the ballon with scissors, slide the normal neck of the balloon over the pump and then the "cut" end over the valve. I can use this system to pump up a mat in under 90 seconds.
Be careful when you warm the mat - don't over do it either in the sun, or with heater, as you don't want to melt any of the welded seams - keep touching the mat in the likely hottest spots, and if it's getting above your own skin temperature, it's probably too hot, You probably want around 35 degrees or so (that's celsius).
A great thing about this DIY system is that it costs me nothing - literally a few dollars for the pump, balloons are, like, $1 a bag. For car camping or short hikes, I've started taking the pump with me - to save time later on at home. And it's easier on the lungs.
 |
| balloon pump blowing up mat |
Air mats can be repaired, but I've found it's hit and miss - sometimes the problem is finding the damn leak - and sometimes the repair just doesn't seal. I never lay my mat on bare ground - I'm terrified of a small barb or sharp pebble creating a puncture - it only ever lays on the floor of my tent (preferably with a groundsheet underneath).
If you use a self inflating mat, the instructions suggest you store with the valve open, inflated - so that the foam inside doesn't become compressed. If it does, you then need to finish off the inflation with some puffs, which introduces moisture - eventually the foam decomposes and your mat is dead. If you need to blow up the mat, use the (described) balloon pump drying method to remove moisture.
Tents. Clear the ground before you pitch a tent to avoid punctures in the floor. Similarly, pitch away from sharp branches/bushes. Stay well away from a campfire - you don't want ember burns putting holes in your fly. Don't use insect repellent/deodorant/hair spray/anti-perspirant/sunscreen etc. inside a tent - often the chemicals can "attack" the water-proofing layers of a tent (and so too gore-tex jackets). One problem I've had is that birds (Kookaburras in particular) will use tents as a perch - but their claws will punch tiny holes in your fly - so no longer waterproof! Shoo them away!
Be especially careful of poles - I've noticed in recent years that some tent manufacturers have reduced pole diameter (whether to save you weight, or to save them expense) and thus strength, and poles are more fragile than those of ten years ago. Eg. the more commonly found DAC poles seem less strong than the older Easton poles. Treat them with great care, especially don't drop them or let the shock cording "snap" poles together too strongly.
If cooking in a tent, be very careful of burns to the fabric - I have a rule that when cooking in the vestibule, nobody may enter or exit by that door, and preferably everyone sits still and stays at the other end of the tent as much as possible. Hot food inside the tent must be handled very carefully - more for safety, though, than tent care.
Do not "overfill" a tent - my students love to cram 7,8 or more into a 3 person tent for "ghost stories" or whatever, but it will just wreck the zippers or stretch/rip the tent inner material.

At home, air your tent so that it's thoroughly dry - otherwise you'll get mould during storage, which smells bad and probably reduces your water-proofing - and fabric longevity. Air everything - poles and pegs - and turn the stuff sack inside out to get it thoroughly dry. Don't wash your tent - sponge off dirt or stains.
Pack. In general, backpacks should be pretty resilient - dry them after your hike, and treat with the respect they deserve. Don't overload lightweight packs - the stitching, zippers or other fabrics will let you down.
Clothing. Looking after clothing is pretty obvious - treat gently, wash according to instructions (or use gentler cycles for greater longevity). Sometimes it's not possible to protect clothes, eg. during a bush bash they're going to get scraped and scratched by foliage, you just have to accept it. Down jackets, like sleeping bags, deserve special protection in rough environments, and should be kept packed away unless absolutely necessary for warmth. Raincoats also will suffer if snagged, but if it's raining hard you really have little choice.
Electronic items - torches, radios, cameras, mobile phones, gps etc. - often very expensive, they should be kept safe and secure within the pack, away from damage and moisture. I'll usually zip lock this stuff if there's rain about, and only use them when safe to do so, ie. away from water and rough situations. One thing I learnt a few years ago was that Sanyo eneloop batteries are by far the best value rechargeable batteries, and I now use them exclusively. Although their stated capacity is lower than many other brands, they produce more usable ampage, and so last much longer in the field (eg. with our 2 watt walkie talkies, they last double the other brands before going flat!). Needless to say, rechargeable batteries are the only way to go when maximising economy - cost per use.
Cooking gear. Generally pretty sturdy, though cutlery can be fragile. Treat your stove gently, especially as you don't want a "Fail" in the field. I save money by re-filling my gas canisters with butane - you need a special nozzle to fit the cheap butane canisters to a Lindal valve, and the butane will not work below 5 degrees C. Each refill, though, saves me around $10 - $12, so (for me and my partner) its well worth it - saving around $100/year.
Of course, much of the cost/use question comes back to the original price of an item compared to its useful life, and that is not always straightforward, eg. cheaper boots may cost more than dearer boots that last longer, or can be repaired. For every item, you need to consider that equation, and of course the cost issue becomes relative to your income.
Hope these ideas help you stretch your dollar further, which eventually you can put towards more bushwalking!

Friday 30 August 2013
It's been a while since the last post, so apologies for that. Just updating about my recent, annual backcountry ski pilgrammage which I usually do with two old mates, Ian and Alex. You can see the pics and read the story at:
Ski.com.au ski trip report
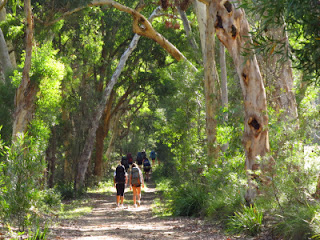
The other thing I'd add is that, for the first time I used my Black Wolf B-lite pack, 55 litres and under a kilogram, resulting in a full weight on day 1 of around 12 kg, dropping to under 10 kg by the time we made it back to the car, after four days. This compares to my mate's 20kg + packs, which I have to admit I just wouldn't carry unless I was absolutely forced to. My weight included two small cameras, a small gorillapod style tripod, lots of spare camera batteries, and a larger than necessary head torch (which i like to give the option of night skiing and/or evacuations.)
The pack was worked beautifully, with a minor disadvantage that my portion of the tent was carried in a waterproof stuff sack strapped on the back, below the lid.

The other small drawback with the pack is that it is not great for externally attaching other larger components, like the snow shovel or a largish set of tent poles. Working with my mates, carrying some of their gear in exchange for mine, solved this problem.
I'm still working on reducing my winter pack weight, with options for a lighter down jacket, a bit less food (got back with about 500 grams, probably too much in reserve), and so on. This pack now getting well into its second year of use, continues to delight. For under a hundred dollars, I thoroughly recommend it.
 Ian hauls excess baggage
Skibug
Ski.com.au ski trip report
The other thing I'd add is that, for the first time I used my Black Wolf B-lite pack, 55 litres and under a kilogram, resulting in a full weight on day 1 of around 12 kg, dropping to under 10 kg by the time we made it back to the car, after four days. This compares to my mate's 20kg + packs, which I have to admit I just wouldn't carry unless I was absolutely forced to. My weight included two small cameras, a small gorillapod style tripod, lots of spare camera batteries, and a larger than necessary head torch (which i like to give the option of night skiing and/or evacuations.)
The pack was worked beautifully, with a minor disadvantage that my portion of the tent was carried in a waterproof stuff sack strapped on the back, below the lid.
The other small drawback with the pack is that it is not great for externally attaching other larger components, like the snow shovel or a largish set of tent poles. Working with my mates, carrying some of their gear in exchange for mine, solved this problem.
I'm still working on reducing my winter pack weight, with options for a lighter down jacket, a bit less food (got back with about 500 grams, probably too much in reserve), and so on. This pack now getting well into its second year of use, continues to delight. For under a hundred dollars, I thoroughly recommend it.
Ian hauls excess baggageSkibug
Monday 29 April 2013
Gas and a frog
As summer stretches across autumn, here in Sydney, the days and weeks slip by. I've had a number of hikes over the past 6 weeks, mostly around the Great North walk area of northern Sydney, with amazing warm weather, little rain and some perfect locations - caves, waterfalls, cliff-top views and lovely pristine bushland.
I can't report on any new gear, although I did try out a system of refilling gas canisters with butane - worked well, and made me realise that not only can it save significant money, but allows me to tailor the amount of gas I need carry - eg. 50 grams for an overnighter, 75 grams if an extra person joins us, and so on.
Here in Sydney we don't really have to worry about sub-zero temps rendering the butane useless, although for snow camping I have a couple of ideas for canister warming - safely! More later.
On a hike about two months ago, got out of the tent about an hour after sunset to spotlight an owl I'd never heard before. Walking towards the small creek, I started off shining my torch up into the trees, but soon realised that the strange hooting was coming from under the creek bank - it wasn't an owl, but something - presumbly a frog - in its burrow right beside the stream.
Long story short, it turned out to be an eastern owl frog, or greater burrowing frog - a massive brute of a frog with Popeye forearms. see the Wiki page I've never heard one before - or didn't realise if I had, so it was a delight, although I wish I'd been able to spot him.
Otherwise, business as usual. Looking forward to some cooler autumn weather over the next two months, with campfires, cold nights snuggled into my Rab top bag, which is good to about 5 degrees - or zero with thermals.
I,ll try to post some more pieces soon about lightweight gear, but that's it for now.
Ski bug.
I can't report on any new gear, although I did try out a system of refilling gas canisters with butane - worked well, and made me realise that not only can it save significant money, but allows me to tailor the amount of gas I need carry - eg. 50 grams for an overnighter, 75 grams if an extra person joins us, and so on.
Here in Sydney we don't really have to worry about sub-zero temps rendering the butane useless, although for snow camping I have a couple of ideas for canister warming - safely! More later.
On a hike about two months ago, got out of the tent about an hour after sunset to spotlight an owl I'd never heard before. Walking towards the small creek, I started off shining my torch up into the trees, but soon realised that the strange hooting was coming from under the creek bank - it wasn't an owl, but something - presumbly a frog - in its burrow right beside the stream.
Long story short, it turned out to be an eastern owl frog, or greater burrowing frog - a massive brute of a frog with Popeye forearms. see the Wiki page I've never heard one before - or didn't realise if I had, so it was a delight, although I wish I'd been able to spot him.
.JPG)
Otherwise, business as usual. Looking forward to some cooler autumn weather over the next two months, with campfires, cold nights snuggled into my Rab top bag, which is good to about 5 degrees - or zero with thermals.
I,ll try to post some more pieces soon about lightweight gear, but that's it for now.
Ski bug.
Monday 25 February 2013
The Little things that add up ... or don't.
Whenever you go to the ultralight hiking sites, you'll find this fundamental principle: although shaving a small weight from a single item is of little benefit, the sum of many small savings adds up to a worthwhile reduction. There is no doubt this approach can work, but I've sometimes wondered if the term 'stupidly ultralight' is also true, where the obsession with shaving grams leads to discomfort, impracticality, reduced safety or excessive extra cost.
For example, I've seen hikers replace pocket knives with razor blades, which I imagine are difficult to use safely, and not strong enough to do many tasks properly - like whittling a piece of wood into an emergency replacement part.
Anyway, for this post, I thought I'd look at a few of the smaller items that I use on camping bush walks, and examine worthwhile weight savings, especially in relation to the money cost of those savings.

Have a look at the accompanying photo, where I've shown a few versions of different items I would typically take on 2 to 4 day hikes.
First, let's look at the food bowls, which I carry exclusively for meals (breakfast cereal and cooked dinners like pasta and rice) - no plate, no eating from cups or cooking pots. The typical bowl you'll find in camping stores is the blue plastic bowl, which is quite solid, very heatproof and not too expensive - maybe 10 bucks? It's 70g. The next bowl is enameled metal, unbreakable, not well insulated, and probably also 5 - 10 dollars. It weighs 162 grams, more than double. To the right is another plastic bowl which I picked up in the picnic section of a supermarket for around $3, and is 42grams. It gets a bit hot to hold with soup or a laksa, but it's not a problem.
So far the picnic bowl seems the pick, but look at that clear plastic bowl to the right. Bought at a 'bargain store' as a food storage tupperware, they were 3 for $4 (with snap fit lids), and is a miserly 26 grams. Yes it's a bit smaller, but big enough for my purposes, and allows a smaller pack volume - it actually snugly fits over a gas canister, so virtually disappears into the pack. So - light, functional, and small - and it's cheaper than the camping store product!.
Next, tent pegs - from left to right, a standard alloy 'Shepard' style, and a 'v' section alloy peg (it's a pinky-purple colour). The first weighs 15 grams, compared to 11 grams, so for the bag of 8 which I usually carry, I save 32 grams - a moderate amount, but better than nothing. I'm not sure how much that saving would cost me, as the 'v' section pegs came with an MSR tent I purchased, but if we price the standard pegs at $2 each and (say) $4 for the lighter ones, it would cost $16 to save those 32 grams or 50 cents per gram. Worth it? That's $500 per kilogram.
Have a look at the cups. There are all sorts of possibilities, from plastic and paper picnic cups which way under 10 grams, but are not sturdy or reliable, to the brand name camping store cups which fold up, stack, have lids etc but cost over $20. Here I will just compare a very light plastic cup (it came with a lid which I never use, and is 450 ml) at around $10, with a 350 ml titanium cup, no lid, hot on the lips; $35. Titanium, 65 grams vs plastic, 72 grams - $25 for a 7 gram saving. Definitely not worth it, except perhaps for the ability to boil a 'cuppa' without needing a separate pot. The plastic one is bigger, too.
 The titanium lesson is confirmed when looking at the cooking pots. The pot on the stove is a 1.2 litre aluminium (100g), the one at the back is a 2 litre aluminium (193g), and the one at the front is a 0.7 litre titanium pot (109g) (weights without lids). The 2 alloy pots are from a set of 3, which have a special lid which fits snugly on any of the three (pictured on the biggest pot). So for probably twice the price, the titanium pot is 50% smaller, but weighs more! Admittedly, the alloy pot lid is significant - 105grams, but I'll often not take it, and just use a piece of very light aluminium foil as a lid - it adds 9 grams.
(Edit: I did some subsequent research and decided my titanium pot was an eBay ripoff, as its advertised weight was 85 grams - which is still only 15 grams lighter than the bigger alloy pot - and confirms that titanium is not such a bargain.)
Talking about aluminium foil, the windshield weighs 64 grams and costs around $10, whereas you can use a sheet of aluminium foil from the kitchen cupboard - it does the job in calm conditions or inside your vestibule, but is not sturdy and can blow around if there's a breeze. But in a hut, or in fair weather, the lightweight foil is a no-brainer.
On the subject of cooking, I do make a big sacrifice of weight for convenience with my stove - I use a generic ebay off-canister, pre-heating gas stove ($15, 150 grams), as opposed to the methylated spirits (alcohol) penny stove ($5-$10, 10 grams plus 11g for the wire pot stand) - which saves even more in fuel weight on short trips. I just can't actually cook anything on those alcohol stoves - just boil water. There's no simmer, there's no easy turning on and off, and there's often some fuel spilled - which I'm never comfortable with. So, yeah, the gas stove plus gas canister is going to be around 200 - 400 grams more, but it's definitely a worthwhile trade-off, in terms of functionality, safety and convenience for me.
Note that the gas vs alcohol debate has been examined widely on the net (see http://zenstoves.net/ , for example), and that because of the higher energy density of gas, the weight benefits of alcohol diminish and disappear with longer expeditions and/or larger parties.
Another example of cheap and light is with the water bottles - the nalgene bottles are around $20 and 160 grams, compared to 43 grams and basically free for the recycled soft drink bottle. The only reservation people have about PET bottles is BPA, but this is a furphy as the amounts are insignificant as a health risk. The PET bottles are quite sturdy, and also clear so you can see what's going on in your water.
 Not especially light, but (I find) essential for an enjoyable multi-day expedition, are the odd looking blue slippers, which I put on around the campsite. Nothing beats getting out of heavy boots, feet sore, throbbing and hot, and slipping on these 320 gram neoprene, soft soled booties (I think they're made for the kayaking/water sport market, but I'm not sure; I picked them up on sale from Kathmandu for under $10). I used to use crocs, which were 350 grams, they wouldn't fit nicely inside a pack (so hung on the outside), and had those ventilation holes which let in ants, leeches, thorns, bull-ants and all the other little bitey things around campsites. The booties fold up neatly, and are definitely an 'essential luxury'.
The main gripe I had about toothbrushes was that they always seemed too long to pack in any convenient way, so on my last family holiday overseas, when the stewardess came around with the folding travel toothbrushes, I had the kids put on their sweetest smiles and nabbed a dozen. They're about $1.50 each on "Flea-bay". 13 grams compared to around 20 grams for a regular brush, plus they fold up to half the length, and come with these tiny tubes of paste (good for about 3 or 4 brushes) which are 3 grams (full), AND store neatly inside the folded brush. You can re-fill them by squeezing them, then letting them "suck" the paste out of a regular tube. A small tube of toothpaste, mostly used up, weighs around 25 grams, although you can just squeeze what you need into zip-locks or small containers you pick up from bargain stores (around the size of "carmex" canisters - see the small jar top right).
 Cutlery really doesn't weigh much, and I find the sea to summit plastic spoons and forks work well and are robust enough ($1-$2, 8-11 grams). Those "spork" hybrids are a marketing triumph, as they DON'T work for either purpose - spooning or forking. All those items in the picture are between 5 and 11 grams each - the two smaller ones on the left (6.5 grams each), pack better and also came as part of a kid's lunch tupperware type pack from a "bargain store" for a few dollars. The green items in the middle I bought from a supermarket picnic section ($7 including a pair of chopsticks, 10 grams) on the spur of the moment; they work as a single handle with interchangeable fork and spoon end-pieces, so weigh slightly less and are slightly more space efficient - but when they break, I won't replace them. Too expensive.
The knives/tools I consider indispensable for repairs (shoes, packs, tents, skis when ski touring etc.), and here I figure you get what you pay for - the cost being weight - the heavier the thing, the sturdier and the less likely it will fail when needed. So I mainly decide on what I take based on the remoteness of the camp, the weather, the chances of things failing, and so on. The Swiss army knife, with scissors, is good at 60 grams, but doesn't have pliers. The Gerber, with pliers that I find are often useful, but with no scissors, is 100 grams. Sometimes I'll take the Gerber plus a small (18 gram) baby knife that has scissors (it's the green foldable knife), sometimes I'll take the Swiss army and the smaller, blue multi-tool with light pliers (60 grams).
Torches are also a weight/performance trade, and I've shown three of many options - the button cell torch which is really just a hang-from-the-tent-roof use just before sleep/emergency/back-up torch weighing 7 grams (under $2 on Flea bay, the ultralight choice but low on utility), a fairly standard 110 gram Black Diamond that will do most things reasonably well (although I don't like their system for opening the battery compartment, which eventually fails as the plastic breaks; nor do I like their on-off button, which can be turned on accidentally with pressure in your pack, leaving the torch with flat batteries just when you go to pull it out from your pack at nightfall!) . The Kathmandu unit is 200 grams, bulky in storage and suffers the same problem with on-off buttons, but is super bright, runs off 3 AA's (so it lasts), and seems sturdy. When I'm supervising students, I like the security I get from a bright torch, something that is really useful in emergencies, searches, or walking bush trails at night safely. (All stated weights are with batteries - three AAA's are 38 grams, three AA's are 78 grams, so they make up about one third of the total.)
I prefer to use rechargeable batteries in torches for economy and environmental reasons, but strangely the Kathmandu torch will only except alkalines - my Sony en-loops must be marginally fatter, and will only slide into the tube-like compartments with force, refusing to then slide back out. I always take more batteries than I think I could possibly need, and will often also pack a couple of tea-light candles for emergencies - they burn for hours, and will (slightly) warm a tent on a cold night.
 Finally, at the back right corner, you see a few small containers, plus a medium sized bottle of insect repellant, and that's all there just to demonstrate the idea that you really should always reduce sun-screen, insect repellant, soaps, cooking sauces etc. to the smallest quantity required, and carried in appropriately sized and light weight containers, which again can often be found cheaply in the "bargain stores". If you're travelling in a group, these fluids should be consolidated to save packaging weight.
So, a few conclusions:
For example, I've seen hikers replace pocket knives with razor blades, which I imagine are difficult to use safely, and not strong enough to do many tasks properly - like whittling a piece of wood into an emergency replacement part.
Anyway, for this post, I thought I'd look at a few of the smaller items that I use on camping bush walks, and examine worthwhile weight savings, especially in relation to the money cost of those savings.
Have a look at the accompanying photo, where I've shown a few versions of different items I would typically take on 2 to 4 day hikes.
First, let's look at the food bowls, which I carry exclusively for meals (breakfast cereal and cooked dinners like pasta and rice) - no plate, no eating from cups or cooking pots. The typical bowl you'll find in camping stores is the blue plastic bowl, which is quite solid, very heatproof and not too expensive - maybe 10 bucks? It's 70g. The next bowl is enameled metal, unbreakable, not well insulated, and probably also 5 - 10 dollars. It weighs 162 grams, more than double. To the right is another plastic bowl which I picked up in the picnic section of a supermarket for around $3, and is 42grams. It gets a bit hot to hold with soup or a laksa, but it's not a problem.
So far the picnic bowl seems the pick, but look at that clear plastic bowl to the right. Bought at a 'bargain store' as a food storage tupperware, they were 3 for $4 (with snap fit lids), and is a miserly 26 grams. Yes it's a bit smaller, but big enough for my purposes, and allows a smaller pack volume - it actually snugly fits over a gas canister, so virtually disappears into the pack. So - light, functional, and small - and it's cheaper than the camping store product!.
Next, tent pegs - from left to right, a standard alloy 'Shepard' style, and a 'v' section alloy peg (it's a pinky-purple colour). The first weighs 15 grams, compared to 11 grams, so for the bag of 8 which I usually carry, I save 32 grams - a moderate amount, but better than nothing. I'm not sure how much that saving would cost me, as the 'v' section pegs came with an MSR tent I purchased, but if we price the standard pegs at $2 each and (say) $4 for the lighter ones, it would cost $16 to save those 32 grams or 50 cents per gram. Worth it? That's $500 per kilogram.
Have a look at the cups. There are all sorts of possibilities, from plastic and paper picnic cups which way under 10 grams, but are not sturdy or reliable, to the brand name camping store cups which fold up, stack, have lids etc but cost over $20. Here I will just compare a very light plastic cup (it came with a lid which I never use, and is 450 ml) at around $10, with a 350 ml titanium cup, no lid, hot on the lips; $35. Titanium, 65 grams vs plastic, 72 grams - $25 for a 7 gram saving. Definitely not worth it, except perhaps for the ability to boil a 'cuppa' without needing a separate pot. The plastic one is bigger, too.

(Edit: I did some subsequent research and decided my titanium pot was an eBay ripoff, as its advertised weight was 85 grams - which is still only 15 grams lighter than the bigger alloy pot - and confirms that titanium is not such a bargain.)
Talking about aluminium foil, the windshield weighs 64 grams and costs around $10, whereas you can use a sheet of aluminium foil from the kitchen cupboard - it does the job in calm conditions or inside your vestibule, but is not sturdy and can blow around if there's a breeze. But in a hut, or in fair weather, the lightweight foil is a no-brainer.
On the subject of cooking, I do make a big sacrifice of weight for convenience with my stove - I use a generic ebay off-canister, pre-heating gas stove ($15, 150 grams), as opposed to the methylated spirits (alcohol) penny stove ($5-$10, 10 grams plus 11g for the wire pot stand) - which saves even more in fuel weight on short trips. I just can't actually cook anything on those alcohol stoves - just boil water. There's no simmer, there's no easy turning on and off, and there's often some fuel spilled - which I'm never comfortable with. So, yeah, the gas stove plus gas canister is going to be around 200 - 400 grams more, but it's definitely a worthwhile trade-off, in terms of functionality, safety and convenience for me.
Note that the gas vs alcohol debate has been examined widely on the net (see http://zenstoves.net/ , for example), and that because of the higher energy density of gas, the weight benefits of alcohol diminish and disappear with longer expeditions and/or larger parties.
Another example of cheap and light is with the water bottles - the nalgene bottles are around $20 and 160 grams, compared to 43 grams and basically free for the recycled soft drink bottle. The only reservation people have about PET bottles is BPA, but this is a furphy as the amounts are insignificant as a health risk. The PET bottles are quite sturdy, and also clear so you can see what's going on in your water.
Not especially light, but (I find) essential for an enjoyable multi-day expedition, are the odd looking blue slippers, which I put on around the campsite. Nothing beats getting out of heavy boots, feet sore, throbbing and hot, and slipping on these 320 gram neoprene, soft soled booties (I think they're made for the kayaking/water sport market, but I'm not sure; I picked them up on sale from Kathmandu for under $10). I used to use crocs, which were 350 grams, they wouldn't fit nicely inside a pack (so hung on the outside), and had those ventilation holes which let in ants, leeches, thorns, bull-ants and all the other little bitey things around campsites. The booties fold up neatly, and are definitely an 'essential luxury'.The main gripe I had about toothbrushes was that they always seemed too long to pack in any convenient way, so on my last family holiday overseas, when the stewardess came around with the folding travel toothbrushes, I had the kids put on their sweetest smiles and nabbed a dozen. They're about $1.50 each on "Flea-bay". 13 grams compared to around 20 grams for a regular brush, plus they fold up to half the length, and come with these tiny tubes of paste (good for about 3 or 4 brushes) which are 3 grams (full), AND store neatly inside the folded brush. You can re-fill them by squeezing them, then letting them "suck" the paste out of a regular tube. A small tube of toothpaste, mostly used up, weighs around 25 grams, although you can just squeeze what you need into zip-locks or small containers you pick up from bargain stores (around the size of "carmex" canisters - see the small jar top right).

The knives/tools I consider indispensable for repairs (shoes, packs, tents, skis when ski touring etc.), and here I figure you get what you pay for - the cost being weight - the heavier the thing, the sturdier and the less likely it will fail when needed. So I mainly decide on what I take based on the remoteness of the camp, the weather, the chances of things failing, and so on. The Swiss army knife, with scissors, is good at 60 grams, but doesn't have pliers. The Gerber, with pliers that I find are often useful, but with no scissors, is 100 grams. Sometimes I'll take the Gerber plus a small (18 gram) baby knife that has scissors (it's the green foldable knife), sometimes I'll take the Swiss army and the smaller, blue multi-tool with light pliers (60 grams).
Torches are also a weight/performance trade, and I've shown three of many options - the button cell torch which is really just a hang-from-the-tent-roof use just before sleep/emergency/back-up torch weighing 7 grams (under $2 on Flea bay, the ultralight choice but low on utility), a fairly standard 110 gram Black Diamond that will do most things reasonably well (although I don't like their system for opening the battery compartment, which eventually fails as the plastic breaks; nor do I like their on-off button, which can be turned on accidentally with pressure in your pack, leaving the torch with flat batteries just when you go to pull it out from your pack at nightfall!) . The Kathmandu unit is 200 grams, bulky in storage and suffers the same problem with on-off buttons, but is super bright, runs off 3 AA's (so it lasts), and seems sturdy. When I'm supervising students, I like the security I get from a bright torch, something that is really useful in emergencies, searches, or walking bush trails at night safely. (All stated weights are with batteries - three AAA's are 38 grams, three AA's are 78 grams, so they make up about one third of the total.)
I prefer to use rechargeable batteries in torches for economy and environmental reasons, but strangely the Kathmandu torch will only except alkalines - my Sony en-loops must be marginally fatter, and will only slide into the tube-like compartments with force, refusing to then slide back out. I always take more batteries than I think I could possibly need, and will often also pack a couple of tea-light candles for emergencies - they burn for hours, and will (slightly) warm a tent on a cold night.
 Finally, at the back right corner, you see a few small containers, plus a medium sized bottle of insect repellant, and that's all there just to demonstrate the idea that you really should always reduce sun-screen, insect repellant, soaps, cooking sauces etc. to the smallest quantity required, and carried in appropriately sized and light weight containers, which again can often be found cheaply in the "bargain stores". If you're travelling in a group, these fluids should be consolidated to save packaging weight.
So, a few conclusions:
- Ebay, and "bargain stores" (we call them $2 shops in Australia) can be your friend - but be extra cautious, as a bargain can often be a disappointment.
- Titanium is over-rated - at best it is slightly lighter than aluminium or plastic, at great expense, at worst it's no better - at great expense. In terms of weight savings per dollar, you're better off looking at the big 4 (pack, tent, sleeping bag and mat) for making substantial savings at a reasonable cost per kg saved.
- Some items will weigh, but are worth it for durability, safety, comfort, convenience or pleasure. You're bushwalking for fun, it's not a military exercise.
- Any item that runs off batteries - take one battery out whilst in your pack to prevent accidental discharge.
Tuesday 29 January 2013
OK, saving weight on your back. Where to start?
The conventional wisdom is that you start with the big three (or four) - tent, backpack, sleeping bag (the three) and sleeping mat (the fourth). These four pieces often make up a half or more of your total carried weight, so savings here have large effects on the total. Straight away, you can see the obvious issues ie. that there will always be a compromise between weight and comfort/utility, eg. a bivvy bag will be lighter than a 1 man tent, but provides less space and function, especially in adverse weather. Similarly, sleeping bags trade weight for warmth, and sleeping mats weight for comfort. Backpacks have a trade-off between weight and volume.
So decisions must be made about the level of comfort/utility that is the minimum for an enjoyable and safe trip, withregard given to expected weather and terrain, length of hike and difficulty, age and fitness of the hiker, goals and expectations, levels of acceptable risk, and so on.
So here we see clearly that there is no "one size fits all" solution, but in fact a matrix of possibilities that individuals must resolve themselves.
So first, a backpack idea.
In my twenties and thirties, I did a lot of travelling around the world, usually on extended skiing adventures to Canada, Switzerland, the States, New Zealand and, of course, Australia. In those days I needed a big luggage system that could carry all the clothes, ski accessories, camping equipment and other paraphernalia I needed for three - six month sojourns, so I used a big (85 or 90 litre) Lowe Expedition which I picked up on sale in Canada. It was fantastic - the simple design just swallowed gear, and the cordura material was tough as corrugated iron.
The great thing about the pack was I could fill it up with my travelling stuff flying out of Sydney - it worked great as airline luggage; at my destination, I could walk to the hostel through town with the thing comfortably on my back; and in the second half of the season. it served triple duty for backcountry ski touring, as well as below snow-line camping. I trekked for three weeks in the Himalayas with it, getting to 5,400 metres and camping in -20 degrees Celsius. It was versatile, reliable and trustworthy. I actually still have it in my cupboard - it's over 30 years old and still functional.
At the time, I did not know how much it weighed - as a fit guy in his twenties, I just threw it on, regardless of weight, taking pride in how much I could carry. (It was 2.6kg) Today, different story. In my efforts to minimise weight I've realised there are great savings to be made by carefully monitoring weight, and packs are at the lead in savings.
Case in point - forthe last few years I'd been using a 65 litre Katmandu pack, which was fairly tough, comfortable, with two main compartments and a lid pocket, extension straps on the lid for extra volume, a very supportive harness and so on. Nothing wrong with it functionally, everything like zippers and straps all work fine, no issues with the pack.
3.2 kg.
About a year ago, doing some research on lighter packs, I discovered the Black Wolf B-lite, a 55 litre pack, 1 compartment, 1 lid and two side pockets, two aluminium stays as a basic frame, unpadded waist belt, no harness length adjustment, but still quite comfortable.
Under 900 grams
Under $90
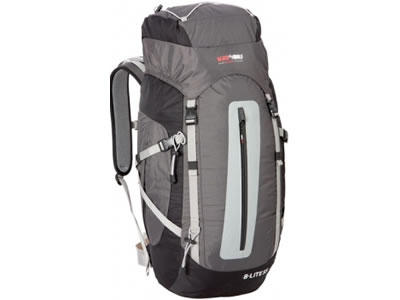 I've been using this for about a year, and am quite chuffed with it. It's definitely not as rugged or abrasion resistant as the Kathmandu or other name-brand packs, and of course it's smaller than most packs people would use, but for my mostly fire-trail and open track walks, it's fine. And losing the 10 to 15 litres in volume is easy if you go down the same "light and small" path with tent and other gear.
It does have what I consider a fairly pointless zipper that provides access to the main compartment - without it you'd have an even lighter pack with less risk of failure and leakage. The other possible weaknesses are that the stitching of the shoulder straps and other attachment points may be less than robust - there is a haulage strap on the top which I've slightly stretched the stitches on - and of course, the non-adjustable harness limits this pack to people between around 160 - 185 cm tall. Its small volume, potentially vulnerable attachment points, and un-padded waist belt limits the capacity to around 12 or 13kg, above which you can feel it struggling to manage the load.
But for my purposes, it's done everything I've expected of it, has been comfortable and functional, and at the price I'd be content if it had only half the life-span of heavier/dearer packs. At this stage, though, I think I'm going to get at least 100 days use out of it (I hike around 40 - 50 days per year), so I'm more than happy with that.
So, by spending $90 I've saved more than 2kg of load - that's some of the best value for money you'll get in the pursuit of the portable backpack. Of course, there are other lightweight packs you should also research as well - the Osprey Exos, for example - and you may decide that the Black Wolf does not have all the features you may require - volume, ruggedness, adjustable harness - but it's definitely worth a look.
Skibug
The conventional wisdom is that you start with the big three (or four) - tent, backpack, sleeping bag (the three) and sleeping mat (the fourth). These four pieces often make up a half or more of your total carried weight, so savings here have large effects on the total. Straight away, you can see the obvious issues ie. that there will always be a compromise between weight and comfort/utility, eg. a bivvy bag will be lighter than a 1 man tent, but provides less space and function, especially in adverse weather. Similarly, sleeping bags trade weight for warmth, and sleeping mats weight for comfort. Backpacks have a trade-off between weight and volume.
So decisions must be made about the level of comfort/utility that is the minimum for an enjoyable and safe trip, withregard given to expected weather and terrain, length of hike and difficulty, age and fitness of the hiker, goals and expectations, levels of acceptable risk, and so on.
So here we see clearly that there is no "one size fits all" solution, but in fact a matrix of possibilities that individuals must resolve themselves.
So first, a backpack idea.
In my twenties and thirties, I did a lot of travelling around the world, usually on extended skiing adventures to Canada, Switzerland, the States, New Zealand and, of course, Australia. In those days I needed a big luggage system that could carry all the clothes, ski accessories, camping equipment and other paraphernalia I needed for three - six month sojourns, so I used a big (85 or 90 litre) Lowe Expedition which I picked up on sale in Canada. It was fantastic - the simple design just swallowed gear, and the cordura material was tough as corrugated iron.
The great thing about the pack was I could fill it up with my travelling stuff flying out of Sydney - it worked great as airline luggage; at my destination, I could walk to the hostel through town with the thing comfortably on my back; and in the second half of the season. it served triple duty for backcountry ski touring, as well as below snow-line camping. I trekked for three weeks in the Himalayas with it, getting to 5,400 metres and camping in -20 degrees Celsius. It was versatile, reliable and trustworthy. I actually still have it in my cupboard - it's over 30 years old and still functional.
At the time, I did not know how much it weighed - as a fit guy in his twenties, I just threw it on, regardless of weight, taking pride in how much I could carry. (It was 2.6kg) Today, different story. In my efforts to minimise weight I've realised there are great savings to be made by carefully monitoring weight, and packs are at the lead in savings.
Case in point - forthe last few years I'd been using a 65 litre Katmandu pack, which was fairly tough, comfortable, with two main compartments and a lid pocket, extension straps on the lid for extra volume, a very supportive harness and so on. Nothing wrong with it functionally, everything like zippers and straps all work fine, no issues with the pack.
3.2 kg.
About a year ago, doing some research on lighter packs, I discovered the Black Wolf B-lite, a 55 litre pack, 1 compartment, 1 lid and two side pockets, two aluminium stays as a basic frame, unpadded waist belt, no harness length adjustment, but still quite comfortable.
Under 900 grams
Under $90
It does have what I consider a fairly pointless zipper that provides access to the main compartment - without it you'd have an even lighter pack with less risk of failure and leakage. The other possible weaknesses are that the stitching of the shoulder straps and other attachment points may be less than robust - there is a haulage strap on the top which I've slightly stretched the stitches on - and of course, the non-adjustable harness limits this pack to people between around 160 - 185 cm tall. Its small volume, potentially vulnerable attachment points, and un-padded waist belt limits the capacity to around 12 or 13kg, above which you can feel it struggling to manage the load.
But for my purposes, it's done everything I've expected of it, has been comfortable and functional, and at the price I'd be content if it had only half the life-span of heavier/dearer packs. At this stage, though, I think I'm going to get at least 100 days use out of it (I hike around 40 - 50 days per year), so I'm more than happy with that.
So, by spending $90 I've saved more than 2kg of load - that's some of the best value for money you'll get in the pursuit of the portable backpack. Of course, there are other lightweight packs you should also research as well - the Osprey Exos, for example - and you may decide that the Black Wolf does not have all the features you may require - volume, ruggedness, adjustable harness - but it's definitely worth a look.
Skibug
Subscribe to:
Posts (Atom)